|
Mail Client Configuration in Outlook
|
||
|
For this example, let's set the following pre-conditions: 1. We have to set up a new domain and called "domain.com" 2. Insert user account information for the domain called "postmaster@domain.com". 3. Set up Outlook to check mail for and "postmaster@domain.com" and will also use that user for SMTP authentication, so that I can send mail. Step 1: Go to E-mail account configuration
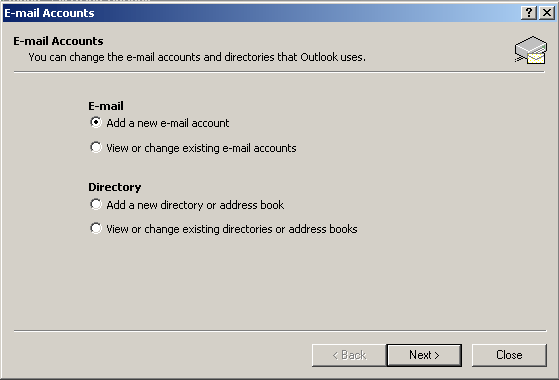
Select "E-mail Accounts" under Tools. Step 2: Add a new E-mail account
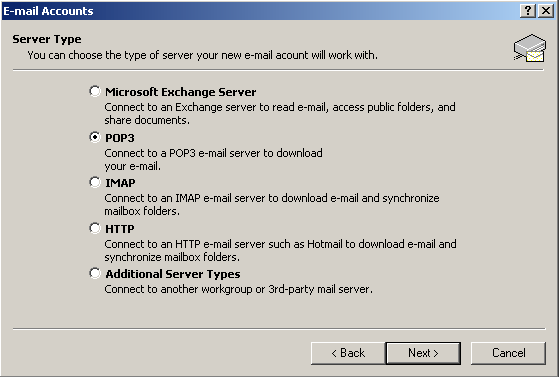
When finished, click "Next". Step 3: It's a POP3 type of account
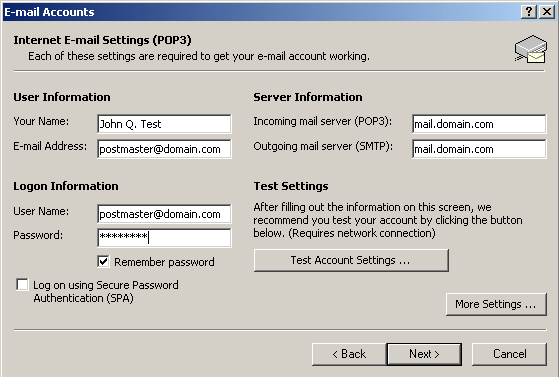
When finished, click "Next".
Click on "More Settings" once you've filled out the above
information. Step
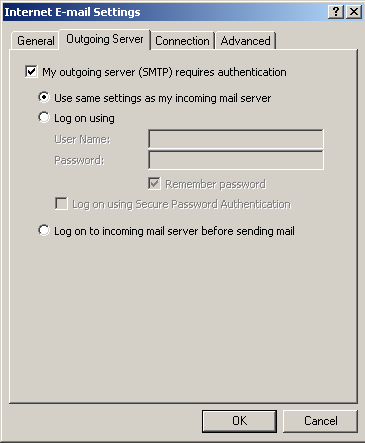
5: Enable SMTP Authentication (under the "more settings" area):
Save all changes and
give it a go! You should be all set.
When you configure Outlook to use our email
server as the outgoing SMTP server, those connection attempts
get blocked. You may get an error message like "Could not
connect to server".
Mostly, this is due to
the Internet Service Provider (ISP) blocking
foreign connetions to port 25 (smtp). Some ISP's block attempts to connect to a foreign SMTP server.
This is an anti-spam measure. The solution is to use your ISP's
SMTP server instead of your own.
Of course, whether or not you configure Outlook to use SMTP
authentication at this point is strictly determined by what your
ISP's SMTP connection rules are. If you need help, contact your
ISP. |
||


